Welcome back great people. Thank you for taking the time to once again return to read through the next update in this restoration. This is shaping up to be quite the update. Hugely exciting stuff to get through, in both this and the post that will quickly follow. Knowing where this is going, I cannot wait to share both with you, so without further ado, it is time to stop talking and retrieve the racing gloves out of storage and get ourselves race ready….
Author’s note – this update kinda got away from me, as I kept doing little bits on the cab, which I then decided to add, whilst I was still editing the post, and it just kept growing and growing into what we now have below. Sorry for the wait, hope you enjoy it.
PS: This is definitely, a four bar KitKat read time. The mother of all updates. Do not skimp on the biscuits…
PPS: One of my subscribers has requested I include a few more photos, after some text heavy updates. So this post is tailored specifically to meet his needs. I’m fairly sure he likes to print them out and glue them into a scrapbook entitled “The things I would like to do, if I was as young and as good looking as Neil”. Hope you like this one, Mark….
***
We left the last update, which you can recap HERE, with a working PCB set, thanks entirely to the knowledge and skill set of a very good friend, and I was hoping to quickly get the tested innards off my bench and back in to the cabinet, freeing up much needed space, but I was really struggling to get hold of some new, required t-molding, with the main stockist in the UK, Arcade World, out of stock and T-Molding.com in the US, no longer shipping to the UK, unless part of a bulk order.
Knowing that I would need to lie the cab down on it’s back/side to fit this, for reasons we will cover later, I didn’t want to start refitting the monitor, etc only to have to remove it again to do this, so it was time to start ticking off some of the smaller, but just as important jobs.
First up, let’s tackle the (very) rusty metal work on this cabinet. The below picture shows the glass bezel bracket, the marquee brackets (top and bottom) and the rear air vent. Not too pretty…

The process with all of these parts is to first sand away the old paint and with it, the rust that has built up on the surfaces.


After this, I then use Hammerite Smooth Metal Spray paint, which has a built in primer, to repaint each section. I also replaced the very worn foam tape, which is used to protect the glass bezel and marquee from directly contacting the metal.

Whilst I was at it, the metal coin box got the same treatment, although why this was so rusty is a little puzzling? Was it from drinks spilled through the control panel, water ingress, we’ll never know, but time to make it good again.


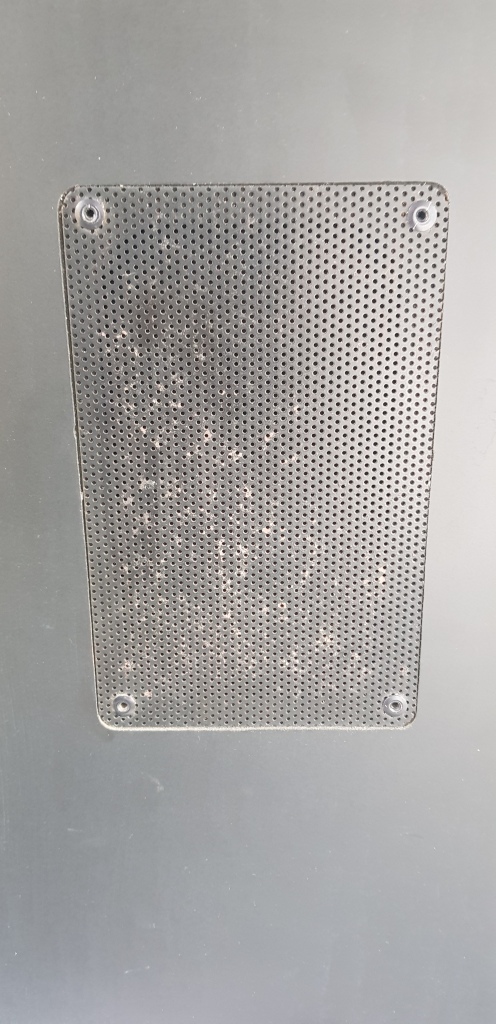
And whilst the spray can was out, I also sprayed the speaker grills on both the front and top sections. These are riveted into place, so far easier just to mask up the surrounding area and spray in situ, than try to remove from the cabinet in order to paint.

Inside the metal coin box section, sits a plastic bucket, into which the coins fall and wait to be collected. For this I used Autoglym’s Bumper Care product to polish out the scratches and bring it nicely back to black.


Another paint job, was to tackle the coin door. It too was rusted, with a lot of the paint bubbling and peeling in places, both on the inside and outside surfaces.


Of note here, is a nice little mod, added by the previous owner, which I’ll point out now, as an often asked question is how to credit machines without drilling holes for a credit button etc. You can see on the above photo, the right hand coin slot has a modified label, indicating “push to coin up”, instead of the usual “push to reject” your coin, etc. And if we look at the coin mechanism itself on the inside of the door, below, you can see that when pushed, the other side of the button pushes a thin metal strip against a microswitch, which is wired into the original switch that recognises a coined up credit, thereby completing the circuit and adding a credit. I really like this technique, hidden and relatively nonintrusive.

Anyway, back to the task at hand and first up was to strip all the parts from the coin doors and give everything a thorough clean.

Then I used various grades of wire wool to remove all the rust, flaking paint, etc, to leave a nice smooth surface to respray.

Both the doors were then removed from the frame and ready for spray painting. For this I used Hammerite’s Hammered finish paint, again no need for a primer coat with this paint providing the finish, that the coin door originally had.


The same process was applied to the other painted parts of the door that we removed earlier.


And it was now time to put all the pieces back together. You’ll notice that there are no locks on the doors, I will order 3 new matching locks, for these and the rear door in due course.


The next part to get some attention was the test/service panel. This sits inside the cabinet and is accessed through the upper coin door. This panel holds the coin counters, you can see a total of just over 180 thousand plays, before I took ownership, the volume control and a switch to enter the test/service mode.


As you can see from the photo above, this too had suffered from quite a bit of rust, so I stripped it of all the parts, cleaning those as I went, leaving the panel itself, to sand back and respray, using the same procedure as above. Then it was just a case of putting it all back together, giving us this.


One final job for the spray can, and it is one that is sometimes overlooked and maybe not completely necessary on all parts, but I’ve also sanded back all the screw and bolt heads that were originally anodised in black, and repainted these too. Of course some (most) of these will be hidden and never seen, but others, such as the bolts that hold the control panel, are very visible, so we want/need these to look as good as possible.


Whilst I’ve been busy sorting all the above, Arcade World have got their t-molding back in stock, so enough smooth black ¾” was ordered.
Some preparation work was needed on the cabinet itself though, whilst I awaited this being delivered.
You may recall, from episode 6, which you can read HERE if you missed it, the much needed wood work on the battered bottom corners of the cabinet had left it solid and sound, but looking a little worse for wear, where parts of the vinyl was missing and the wood filler showing through.


Again, as I have said before, I don’t want the cab to be perfect, it simply isn’t, but it is an honest 40 plus year old game and I just wanted to blend in the repair, enough to stop your eye immediately going there.
I ordered some textured vinyl from Arcade Art Shop, the colours were never going to match exactly as those 40 odd years of sunlight etc, has altered the shade of mine, but both Olly and I knew this and again, it was just to make it better, not perfect.
I then just cut out a suitable shape that covered up the filler, whilst looking aesthetically pleasing and applied over the top. This will also help secure the edges of the original vinyl and hopefully prevent any more from coming away over time.

I also needed to do some work on the actual molding groove itself, specifically around some areas on the lower part of the cabinet. Where this cabinet had taken water damage at some point, and this being an Atari Ireland cabinet, which were made from chipboard and not plywood, once these panels get wet, they act like a sponge and the wood swells up.
This has two side effects; firstly the overall width of the panel expands, which becomes an issue as it is now wider than the molding itself; and secondly the size of the groove expands also, meaning it is too wide for the molding to effectively grip onto and hold itself in place.
It was time to tackle both these issues whilst I had the cabinet on it’s back.
First up was the groove. You can see from an earlier photo here, just how wide it had become in places.

To resolve this as best as possible requires two stages. The groove, at it’s worst points, is refilled and re-cut; then the whole edge, all the way around the cabinet is painted black.
The re-cut groove, obviously grips the molding much better, as it would’ve originally, whilst the painted edge means that where the overall thickness has swollen past that of the molding because it is now the same colour, black, and not the bare wood, it doesn’t stand out or draw the eye.


Then it was time to fit the molding. I have covered this loads in previous restoration posts, so won’t labour the point here, you can check out some of my other earlier restorations for more information if you are trying this yourself for the first time.
But use a nice soft mallet, a sharp knife and give yourself plenty of time and space to manoeuvre.

One final job whilst at this stage was to buff up the front laminate panel. These get a lot of abuse and are nearly always scratched and marked, but the laminate is tough stuff and rarely needs replaced, unless it is really broken and it’s not a job for the faint hearted either. So, trying to clean it up first, would always be my advice.
I used various products as per the photo below, a micro polish, some back to black and finally a glaze, all applied using a magic sponge and then buffed with a cloth to finish.

It’s quite hard to show up in photos, but I tried to show the difference on a particular section which was badly scuffed and scratched.


Once completed the whole panel looked much more respectable.

At long, long last, it was time to get the cab back up on it’s new feet and begin the process of putting everything back together….
[Now, would be a good time to refill our cups with brew number two and pick up some custard cream chasers whilst we are in the kitchen….]
First to go back on was the iconic dashboard and control panel, just seeing the cabinet with this in place, really made me smile.

Staying at the front of the cabinet, I fitted the coin door and mechanisms next.

And then after that the foot pedal assembly was slid back into place. All of these were bolted into place with shiny newly painted bolts.

So far so good. The cabinet was starting to take shape and the more I fitted to the cabinet, the more space I was freeing up in the games room.

Next up was the monitor. Fitted via the front of the cabinet it was good to get this back inside, if only to remove the risk of necking the monitor whilst it knocked around the games room.

Next up was all to remove all the electronic innards from the bench and refit them back into the cabinet and connect up the main loom to all the component parts. I had kept all the original loom fixings, which were simply screwed back into position, which hugely helped in remembering/working out, how the loom snaked around the inside of the cabinet.

Once done, I checked all the connections were right, then checked again and then again, before turning on the cabinet, for the first time since getting it late last year…. No PCB remember, just yet, just testing what we have so far.

With everything doing as it should, I left it on for a while to make sure nothing became angry, after which, with no magic smoke appearing, I was happy with what I had.
I then got the cardboard monitor bezel down from a shelf and out into some decent light, where I assessed it’s condition. It wasn’t too bad at all. One corner had taken a bit of a bashing at some point, and was folded in on itself. I’m never quite sure how these bezels, protected from all sides, within the cabinet, get so damaged, and even when I tried pushing it back into place it just folded back in again. It doesn’t show up so well in this photo, but it was annoying me. Also, you can see the foam tape has seen better days too. Let’s take care of this.


I applied some cut down wooden strips, glued these to the back, spanning across the folded area and clamped it all in place. Once dry the wood held the cardboard in the correct original position and it looked much better. I touched up all the creases with black ink and replaced the foam tape on both sides and fitted it onto the cab with a couple of staples. Another job ticked off the list.


Next up was to clean, polish and fit the glass bezel. This was in really, really good original condition, so just a quick clean and it was ready to go back onto the cabinet.

On the photo above, you can see the space, where the marquee light and upper speaker sits. I had already tested these on the bench and this was the first Atari cab I have had, where the marquee light was still working. Now this has both pros and cons…
The pro, is that I don’t need to replace it, and get to have the nostalgic flicker as the fluorescent tube kicks into action on power up. But if this is something you need, or want, to replace, you can see how easy it is to do, in my Centipede restoration HERE.
The con, is that these tubes take their toll on the marquee itself, washing out the colours. My marquee is original and as a result, has lost quite a bit of it’s vibrancy, especially the red colouring, which always seems to be the most affected colour.
But the marquee is original, I don’t want, or need, to replace it at this time, as you’ll see it still has some colour, so, for now I’m just going to keep the original light fitting too.

With this in place and connected to the main loom, I fitted some new foam tape to the painted marquee brackets and fitted these over the front.
Below you can see it in situ, and then illuminated from behind.


Which is where I think I will end this update.
Erstwhile, the work has continued apace, and I can confidently say that the next update, will not be far behind, as it just needs written up.
This will include the pairing of Pole Position with the PCB, the potentially problematic power up, puzzling problems, pies and maybe even more words beginning with the letter P.
It’s an exciting time, a time to reflect on the help received from the community, a time to wonder if my childhood game will actually be mine to both own and play.
It’s an update you will not want to miss, whether you have followed this from the very start, ten updates and almost a year ago, or just stumbled across this page for the first time.

If you like what I’m up to, please subscribe, read through my earlier posts, hit like and share on the social media of your choice, via the buttons below, etc.
I genuinely would love to hear what you think, good or bad, and will always reply to any comment, kind enough to be left.
Thank you for taking the time to read through, see you all very soon for the next instalment.

Remarkable attention to detail, Neil, with great results to show for it. Can’t wait to read the next episode!
LikeLiked by 1 person
Thank you Alan. It’s been a labour of love, but what else would you expect for one of my favourite games…
LikeLiked by 1 person